Get the collections, fields, and slugs right on day one, and your Framer CMS blog will carry you through a hundred posts without a single rebuild. Framer CMS is flexible enough to scale well beyond most blogs’ needs, but it’s plan-heavy: the structure you set up before your first post is the structure you’ll live with, whether you’re publishing post five or post fifty.
The whole setup takes just a few hours. You’ll create collections for posts, categories, and authors, build a post template and an index page, and configure slugs so every URL stays clean and permanent. This guide walks through the exact setup from start to finish: the fields to create on day one, how to structure your collections, slug configuration, SEO settings, costs, and a working workflow. It ends with a checklist for post number one.
The goal is a blog that works the same at post 5 as at post 50, with no rebuilds and no broken links.
On this page
- The Seven Day-One CMS Fields You Need Before Your First Post
- Separate Collections for Posts, Categories, and Authors
- Flat, Keyword-Rich Slugs and the Redirect Tradeoff
- Design Your Post Template Once and Every Article Inherits It
- How to Add a Blog to Framer with Collection Lists and Filters
- Framer CMS Blog SEO with Metadata, Schema, and Links
- What Framer CMS Scaling Really Costs and Where It Hits Limits
- Publishing Workflow, CSV Import, and Automation Options
- Checklist for Post Number One
- Frequently asked questions
The Seven Day-One CMS Fields You Need Before Your First Post
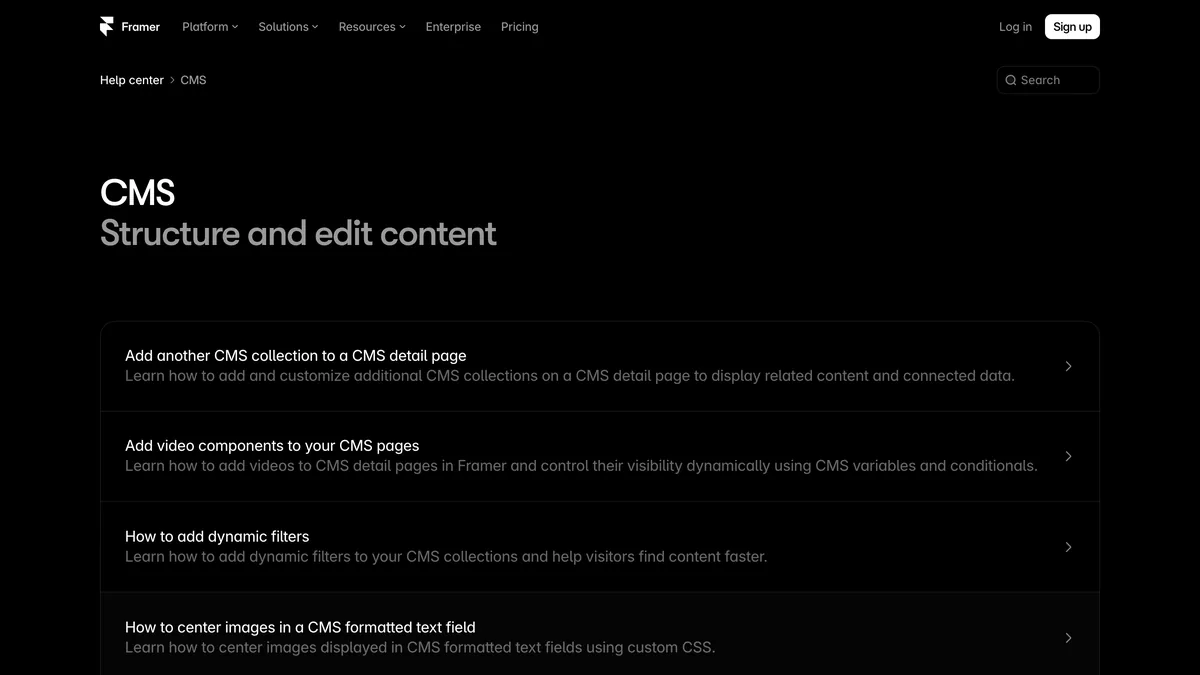
Before your first post, create these seven fields:
Add a title field as Plain Text for the post’s headline.
Add a slug field (Slug) that generates the URL from the title.
Add an excerpt field as Plain Text for the short summary shown on index pages and in search results.
Add a cover image field (Image) for the featured visual at the top of the post.
Add an author field as a Reference linking to an author collection entry.
Add a date field (Date) for the publish date.
Add a category field as a Reference linking to a category collection entry.
That’s the core set, but don’t stop there. Add SEO Title, SEO Description, a social image sized for sharing, a canonical URL if you syndicate content, tags as a multi-reference field, and a featured toggle for pinning posts to the homepage. Retrofitting these onto a 50-item collection is tedious enough to make you put it off forever. You’d have to open every single post, fill in the missing metadata one by one, and hope you didn’t miss any. Do it once now, while the collection is empty, and it takes minutes.
Adding a field later is the expensive move, and the data entry is only part of it. Every new field means opening each existing post to populate it, updating your templates and collection pages to render it, and risking inconsistent metadata when some posts get filled in and others don’t. A category field added after thirty posts means thirty trips through the CMS, thirty chances to typo a category name, and thirty posts that might not all get the same treatment. Starting with too few fields is the mistake that turns a two-hour setup into a weekend project.
Framer CMS has these field types: Plain Text, Formatted Text, Image, Link, Date, Number, Toggle, Color, Reference, and Multi-reference. For the post body, use Formatted Text (rich text) so writers can add headings, paragraphs, lists, links, images, and quotes without breaking the layout. A plain-text body field would force every writer to work in raw HTML, which leads to broken formatting and frustration.
Separate Collections for Posts, Categories, and Authors
The way you organize collections is the biggest structural decision you’ll make in Framer CMS. Split your content into three collections:
Posts hold every blog article you publish.
Categories are the top-level topics your posts fall under.
Authors are the people writing those posts.
Keeping these as separate Framer CMS collections means you never type a category name or an author’s name into a post by hand. Instead, you connect them with reference fields. A reference field links to one item, so an author field points to a single person in the Authors collection. A multi-reference field links to multiple items, which is how you’d attach several tags to one post. One post references one category and one author. The relationship stays clean, and you never have to worry about two posts spelling ‘Strategy’ differently.
Because each post carries a reference to its author, Framer can build an author archive page automatically. An Author Collection Page shows a Collection List of every post referencing that author, with zero manual upkeep. The same logic applies to categories. Create a category page once, and every future post filed under that category appears there on its own.
Keep your taxonomy lean while you’re at it. For a blog under 100 posts, aim for 5 to 8 categories and 15 to 25 tags maximum. More than that and you’re creating categories that hold one or two posts, which dilutes your Framer blog categories and makes archive pages feel thin. And watch your reference depth. Two or three levels of references stay manageable, but chains that go deeper get genuinely hard to reason about. A post referencing a category that references a section that references a team might sound flexible, but it’s a tangle you’ll regret debugging later.
Flat, Keyword-Rich Slugs and the Redirect Tradeoff
Before you create a single post, set your blog collection page path to /blog. That single setting gives every post a clean, permanent URL like /blog/your-post-slug. Avoid nested paths like /blog/category/post-slug. Flat structures are easier for search engines to crawl, and they keep your URLs short and shareable. Once your posts are live, that flat structure is also far simpler to reason about when you’re auditing your site or building internal links.
When you set up your Framer CMS slugs, follow a few simple rules:
Keep slugs lowercase and hyphenated, never camelCase or underscores.
Aim for 3 to 5 words including your target keyword.
Remove stop words like ‘the,’ ‘a,’ ‘is,’ and ‘for.’ They add length without adding meaning.
Let Framer auto-generate the slug from the title, then edit it if the auto version comes out too long.
A slug like /blog/framer-cms-seo-guide beats /blog/the-complete-guide-to-seo-for-your-framer-cms-blog every time. Shorter slugs are easier to type, easier to remember, and carry more keyword weight per word.
Here’s the tradeoff you need to plan for before you publish anything. Never change a published post’s slug without a 301 redirect from the old URL. Change it without one and every internal link, backlink, and social share pointing at that post returns a 404. That’s lost traffic, lost authority, and a pile of broken links you’ll have to hunt down manually. The catch is that site redirects are only available on Framer Pro (DKK 205/month). On Framer Basic (DKK 68/month), there’s no redirect tool at all, so changing a slug after publishing breaks links with no way to fix them. The practical takeaway is to nail your slugs before you hit publish. On Basic, the slug you choose is the slug you keep.
Design Your Post Template Once and Every Article Inherits It
Framer auto-creates a template page tied to your posts collection, and you design it once. Every article you publish inherits that exact layout automatically, so you never rebuild a page design for a new post.
Step 1: Use the auto-created template page. When you create your posts collection, Framer generates a template page bound to it. Open that template and build the layout there. Any changes you make to the template apply to every current and future post.
Step 2: Bind the H1 to the post title. The template needs a headline, but never hardcode it. Instead, bind the H1 text to the post title CMS variable so each article pulls its own title from the collection. Below the H1, add the author, published date, reading time, category, and then the rich text body field. That ordering gives readers the context they need before they start reading, and it keeps every post visually consistent.
Step 3: Structure your headings deliberately. Framer renders rich text headings as proper HTML heading tags, so an H2 in your content editor shows up as an actual H2 in the page code. Use H2 for major sections and H3 for subsections beneath them. Include your target keyword in at least one H2, and keep paragraphs to two to four sentences. This gives search engines a clean hierarchy to read and gives readers a scannable structure.
Step 4: Add navigation and discovery elements. Drop in a table of contents component that links to each H2 via anchor IDs, so readers can jump straight to the section they want. Then add a collection list of related posts at the bottom, filtered to match the current post’s category while excluding the current post itself. That filter keeps the recommendations relevant without ever suggesting the article someone is already reading.
How to Add a Blog to Framer with Collection Lists and Filters
Once your collections and template are in place, the index page is a quick build, and it’s the only page you’ll ever design for your blog’s listing.
Step 1: Drop a Collection List and link the cards. On the blog index page, drag a Collection List component onto the canvas and bind it to your posts collection. Inside the list, display the featured image, title, excerpt, and date for each post, then wrap the whole card in a link that points to the post’s detail page. Because Framer binds the link automatically to the current item’s URL, each card routes to the right article without any manual wiring.
Step 2: Configure sorting, filtering, and pagination. Open the Collection List settings and set the sort order to date, newest first, which is the default for most blogs and the order readers expect. Add filtering if you want to show only certain posts, say a featured-only view or a category-specific section on the homepage. Then set pagination. Once you have more than a few dozen posts, a list that loads 200 items at once will drag down performance and hurt your Core Web Vitals, so paginate or switch to a load-more button. Framer handles the paging for you, so this is a settings change, not a build.
Step 3: Add the CMS Filter component for advanced filtering. When you need more than the basic filter options, drop Framer’s CMS Filter component onto the index page. It lets readers narrow posts by category, tag, or author without any custom code, and a basic setup takes under five minutes. You wire the filter to your Collection List, and the list updates live as visitors click through their options.
Step 4: Let the collection generate the pages. Remember that your blog post collection automatically generates a /blog/[slug] page for every item you publish. The index page’s only job is to list those posts and link to them. You don’t create a page per article, you don’t hand-build cards, and you don’t update the index when you publish. Write the post, and the index picks it up on its own.
Framer CMS Blog SEO with Metadata, Schema, and Links

Bind the SEO title and SEO description to CMS variables on the post template so every post generates unique meta tags automatically. For the meta description, use double curly brackets like {{Description}} to pull the value from the collection field you set up on day one. This means you fill in metadata once per post at creation time, not per post at publish time.
Upload a 1200×630 social preview image for sharing. That’s the standard size for Open Graph images across LinkedIn, X, and Facebook, and it ensures your posts look right when someone shares them. You can also add a canonical URL field to your collection if you syndicate content elsewhere, giving you advanced control over which version of a post search engines treat as the original.
Inject Article structured data into the head section of your post template using custom code. Framer doesn’t add schema automatically, so you need to do it yourself. The cleanest way is a code component that generates JSON-LD from the CMS fields passed as props, covering headline, datePublished, dateModified, author, publisher, and image. That structured data is what lets Google display rich results with the publish date and author name in search.
Every Framer site auto-generates a sitemap at /sitemap.xml and a robots.txt file, so you don’t need to build either by hand. What you do need to handle yourself is internal linking. Each blog post should link to three to five other pages on your site, whether that’s related posts from the same category, a relevant service page, or your pillar content on the topic.
That internal linking is where much of your Framer blog SEO value lives. Every link you place passes context to search engines about what your site covers and spreads authority from your strongest pages to the ones still building it. It also keeps readers on your site longer, which compounds the effect. Set up the metadata and schema once, and the only ongoing SEO work is the links you drop into each post as you write it.
What Framer CMS Scaling Really Costs and Where It Hits Limits
The free plan is a trial, not a home for your blog. It gives 500 credits, a Framer subdomain, and 1 GB of bandwidth. You can build and preview a site there, but running a real blog with regular traffic and images will chew through that bandwidth fast. Treat Free as a sandbox for learning the platform.
| Free | Basic | Pro | |
|---|---|---|---|
| Price | Free | DKK 68/month | DKK 205/month |
| CMS collections | Not available | 2 | 10 |
| Bandwidth | 1 GB | 50 GB | 100 GB |
| Custom domain | Framer subdomain only | Free custom domain | Free custom domain |
| Built-in SEO | Not available | Yes | Yes |
| Site redirects | Not available | Not available | Yes |
| Staging environment | Not available | Not available | Yes |
| Branching with previews | Not available | Not available | Yes |
These prices are region-priced and were read in DKK from Denmark, so your exact numbers may differ depending on where you’re billed. The shape of the tiers, though, holds everywhere. Basic is the entry point for a real blog, and Pro is where the operational tools live.
Additional editors cost DKK 137/month each, which matters if you’re planning a team blog where multiple people log in to write and publish. Viewers, by contrast, are free. You can invite as many people as you like to read and comment on drafts without paying a per-seat fee, which is handy for getting feedback before a post goes live.
On the limits side, a Framer CMS blog scales to hundreds of posts comfortably. The practical ceilings aren’t about post count. They’re about what the platform doesn’t do. Plan-tier CMS item caps put a hard number on how many total items your collections can hold, so a heavy archive plus a large author list counts against the same budget. There’s no multilingual CMS, so a second-language version of your blog means a separate site or a workaround. There’s no API access, which rules out pulling content into other systems or pushing it out programmatically. And there’s no version history on entries, so if someone overwrites a post, the old version is gone. None of these stop a single-language, single-site blog from running for years, but they’re worth knowing before you commit to Framer as your long-term home. Whether Framer suits your project at all is a wider question, and we answer it in who Framer is made for.
Publishing Workflow, CSV Import, and Automation Options
Here’s the workflow you’ll follow every time you publish:
Open the CMS panel from the left sidebar in the Framer editor.
Select the post you want to go live from your posts collection.
Click Undraft to change the post’s status from draft to published.
Click Publish Site to push the update to your live domain.
That’s it. Four clicks and your post is live. The same flow works whether you’re publishing your first article or your fiftieth. No page building, no manual index updates, no design work.
Scheduled publishing is the one gap you’ll notice. Framer has no native scheduled publishing, so you can’t set a post to go live at a specific date and time out of the box. The CMS Scheduler plugin fills that hole, and it’s free for up to 5 scheduled posts, with a $69 lifetime fee for unlimited scheduling. If you’re running a content calendar with more than five posts queued at once, the lifetime license pays for itself quickly.
Importing Existing Content with CSV
If you’re migrating from another platform or bringing over a backlog of posts, Framer’s CSV import is useful. You’ll need to follow a few rules to make it work cleanly:
The first row must contain the headers matching your collection field names
Dates go in ISO format, like 2026-06-09
Booleans are written as true/false, not yes/no or 1/0
Images must be public URLs, not local file paths
Rich text fields accept basic HTML, so you can preserve headings and formatting
Run a test import with a few rows before committing your full dataset
That last point is the one people skip, and it’s the one that saves the most pain. A test import with three or four rows lets you catch mismatched headers or malformed dates while the cleanup is still a five-minute fix, rather than a full-file debugging session.
Automation Options Worth Considering
Once the manual workflow is running smoothly, you can start thinking about automation. At the simple end, manual spreadsheets-to-API workflows let you prepare content in a spreadsheet and push it to Framer’s API. AI content workflows generate and publish posts with minimal human review.
TheSEOAgent charges a flat $99/month and imports finished posts directly into Framer CMS via its Marketplace plugin, setting the slug, meta title, and meta description automatically. The BlogSEO plugin takes a different angle, generating AI-powered SEO content and publishing it straight to your Framer CMS collection. Both plug into the same structure you’ve already built.
A word of caution before you go all-in on automation. Start small. Set up 3 to 5 blog posts and test the layout, flow, and publishing process before you scale. A bug in your template or a broken field mapping is easy to fix at five posts and painful at fifty. Get the rhythm right manually, then let the tools take over the repetitive parts. That keeps quality high while automation increases your output. Build the structure once, prove the workflow, then automate what you can.
Checklist for Post Number One
Before you hit publish on your first post, run through this Framer blog launch checklist. Every item here is a five-second check that catches a problem you’d otherwise discover weeks later.
Verify all seven day-one fields are filled on post number one. Open the post in the CMS panel and confirm each one has a value: title, slug, excerpt, cover image, author, date, and category. A missing excerpt means a blank snippet in search results. A missing cover image means a broken-looking card on your index page. All seven should be populated before this post goes anywhere.
Check the slug. It should be lowercase, hyphenated, 3 to 5 words, and never used before on your site. Confirm the full URL reads
/blog/your-post-slugwith no nested paths and no trailing characters. If the auto-generated version came out too long, trim it now, because on Framer Basic there’s no redirect tool to fix it later.Assign one category and up to a few tags from your lean taxonomy. Then visit the category archive page and the author archive page to confirm this post shows up on both. If either page is missing the post, the reference field didn’t wire up correctly, and that’s a five-minute fix now versus a confusing mystery later.
Open the SEO panel and run the final checks. Confirm the SEO title and description are pulling from your CMS fields rather than showing template defaults. Upload the 1200×630 social image. Scroll through the rich text body and verify the heading hierarchy: one H1, H2s for major sections, H3s for subsections, no skipped levels. When everything looks right, click Undraft and then Publish Site.
That’s the whole launch sequence. Run these four checks on post one, and you’ve validated the exact workflow every future post will follow.
Frequently asked questions
How do you add a blog to Framer?
You create CMS collections for posts, categories and authors, build a post template and an index page, and connect them with reference fields. The setup takes a few hours, and the structure you choose before the first post is the one you keep.
Can you change a Framer blog post slug after publishing?
Not safely on Basic, because there is no redirect tool to repair the old URL. Get the slug right before the post goes live rather than fixing it afterwards.
What social image size does a Framer blog post need?
1200×630. Upload it in the SEO panel, and check that the SEO title and description are pulling from your CMS fields rather than showing template defaults.

Leave a Reply