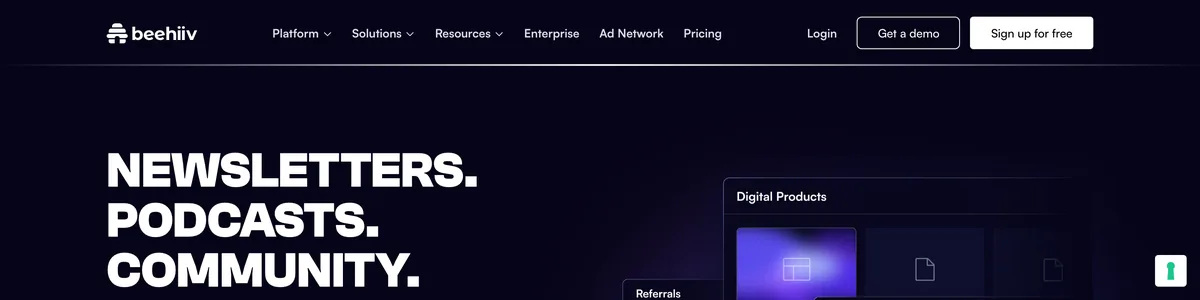
I’ll get you to a live beehiiv signup form on your Framer site, collecting emails with nothing in between. It’s a straightforward integration – two platforms talking to each other cleanly, no agency, developer, or coding required.
Both platforms have free tiers generous enough to pull this off. beehiiv’s Launch plan gives you up to 2,500 subscribers and unlimited sends. It keeps beehiiv branding on your forms, but for a zero-cost start, I think that’s a fair trade. Framer’s free plan supports native HTML embeds, so you can drop the form in without paying a dime for your site plan.
I’ll walk you through the prerequisites for both sides, the two embed methods and when you’d pick each, how to style the form so it doesn’t look bolted on, the welcome flow, verifying a test signup end to end, and where the free tiers max out. I’ll flag what costs extra and what breaks if you skip a step.
Before you touch Framer, grab these three things:
A live beehiiv publication (the free Launch plan works)
A Framer project (the free plan works)
The embed code from beehiiv, generated under Settings → Forms
There are two main embed methods: Framer’s built-in Embed component, and a custom code component for finer control. Both work on a free Framer plan. The next section breaks down the differences so you can pick the right one for your setup.
Prerequisites on Both Sides
When you’re deciding how to embed the form, you’re really choosing between speed and control. The Embed component gets a working form onto your page in minutes and costs nothing. The custom code component is for when you take one look at the default styling and decide you need full control.
No matter which you pick, you start the same way: grab the embed code from beehiiv.
Log in to your beehiiv dashboard and head to Settings → Forms.
Pick the inline form option from the available types.
Copy the HTML snippet beehiiv generates.
That snippet is the whole integration. Everything else happens inside Framer.
The Embed Component (Free, Fast, Simple)
Inside Framer, drop an Embed element onto your page, paste the beehiiv HTML, and the form appears right away. No configuration screens, no saving and reloading.
This works on every Framer plan, including the free one. If you’re on the free plan, the Embed component is your only option, but honestly, it’s a fine choice even on a paid plan if you just want the form live without fuss.
The tradeoff: the Embed component sits inside an iframe, so your styling control is limited. You can fiddle with the layout around it, but the form itself largely sticks to beehiiv’s default look.
The Custom Code Component (Full Control, Paid)
Framer’s custom code component unlocks on the Mini plan ($5/month/site) and above. You’re writing the component yourself instead of dropping in an iframe, so you get full control over styling and behavior.
I’d pick this route if you need the form to match your site’s design exactly, or if you want to override beehiiv branding in ways the free tiers don’t allow. You can also fine-tune validation, success states, and interaction details the Embed component keeps off-limits.
The catch, besides that $5/month/site, is that you’re writing code. If that makes you uneasy, stick with the Embed component.
Side-by-Side Comparison
| Embed component | Custom code component | |
|---|---|---|
| Cost | Free on all plans | Requires Mini plan at $5/month/site |
| Styling control | Limited | Full control |
| Best for | Quick, no-cost setup | Advanced styling or overriding beehiiv branding |
Pitfall Check
If the form won’t render after pasting the code, check these three things:
Confirm your beehiiv publication is published, not sitting in draft mode.
Make sure the embed code is unaltered; a stray character or truncated snippet will break it without a peep.
Verify the Framer page itself is published. Unpublished pages keep the form hidden from visitors no matter how perfect the embed is.
Embed Options and When Each Is Right
The default beehiiv form is going to clash with your Framer site. The Embed component renders inside an iframe, so it locks in beehiiv’s fonts and colors no matter what your design system looks like. The only fix is the custom code component on the Mini plan, where your own CSS gets full control.
If you’re on the Mini plan and want the form to feel like part of your site, here’s how to do it:
Grab your site’s font stack and brand colors and drop them into the embed code with inline CSS or a
<style>block.Match your button styles – hover states, border radius, the works – so the submit button doesn’t scream “outsider.”
Mirror your input field styling, from padding to focus outlines, so the form reads as part of your layout instead of a widget slapped on top.
Without explicit styling, the form can overflow sideways on small screens, and buttons become tap targets you’d curse at. Set container widths to 100% and add box-sizing: border-box to your form elements, then test at 375px – the standard iPhone width. If it looks clean there, you’re set.
Once the form is live and looking right, the welcome flow is where you turn a signup into a subscriber. Inside beehiiv’s Automations, set up a welcome email that fires instantly on signup. Keep the tone in line with your site’s brand voice so it feels like the next natural step, not a robot response.
On the free plan, beehiiv doesn’t force double opt-in, so subscribers land in your list the second they hit submit. That means your welcome email has to earn the open. I’d include a link to your best content right away – something that grabs them and gives them a reason to stick around.
Styling Your beehiiv Signup Form So It Doesn’t Look Bolted On
Everything I’ve described works on free plans, but those plans do have limits.
Beehiiv’s Launch plan stops at 2,500 subscribers. After that, paid plans kick in at $49/month, and that’s also where automations and monetization unlock. On the free plan, you’re stuck with a basic signup-and-send loop.
Framer’s free plan slaps a Framer badge on your site and parks it on a framer.app subdomain. To drop the branding, you need at least the Mini plan at $5/month/site.
The 2,500-subscriber cap on beehiiv is roomy for most early-stage newsletters, and the Framer branding is a fair trade for a site that costs nothing. The moment you outgrow either, the upgrade path is obvious.
What Breaks on Mobile if You Skip Styling
Unstyled forms tend to overflow horizontally on small screens, shoving the page wider than the viewport and creating that annoying sideways scroll. Buttons can shrink to tap targets you’d struggle to hit with a thumb.
The fix is simple but you have to do it: add width: 100% and box-sizing: border-box to the form elements in your embed code. That one line reins in the overflow, and the box-sizing rule stops padding from blowing out your widths. Test at 375px – the standard iPhone width – and you’re safe.
My Honest Take
The integration itself is solid. Both platforms do their one job well, and the embed runs without friction on the free tiers. The beehiiv branding on your forms is a constant reminder that you’re on the free tier, and without automations, your welcome email and any drip sequences stay off-limits until you’re paying $49/month. For a serious growth push, those things matter.
Even so, for a zero-cost start, this stack is tough to beat. You get a professional site, a working signup form, and a dependable email backend for exactly zero dollars. When the free tiers start to feel cramped, you’ll know it’s because you’re growing, and that’s a good problem.
What’s Next
With your form live and pulling in emails, the tech part is basically done. The real work now is content, growth, and deliverability – a separate discipline entirely. I’ve covered that in depth in our guide on running a newsletter for free, so head there next when you’re ready to think beyond the signup button.

Leave a Reply